GNS3 Server (OVA Installation) Esxi


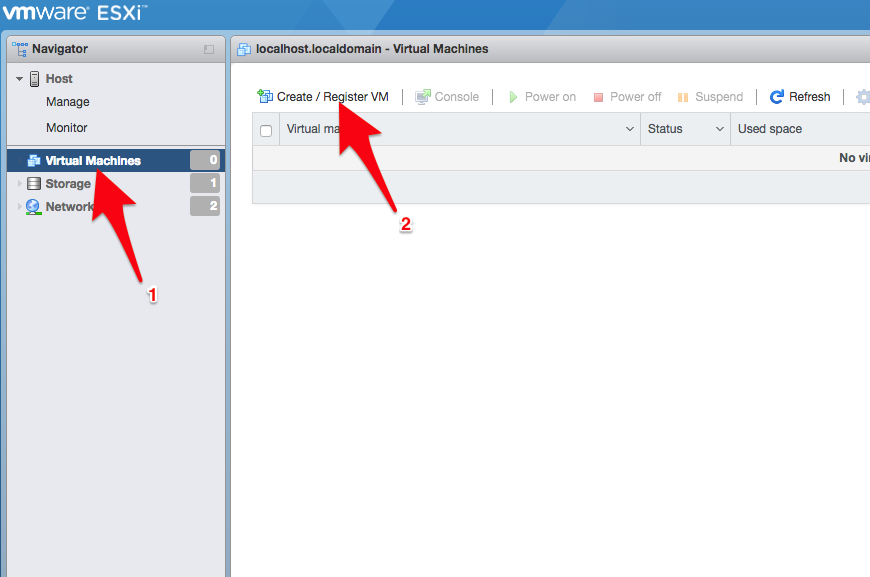
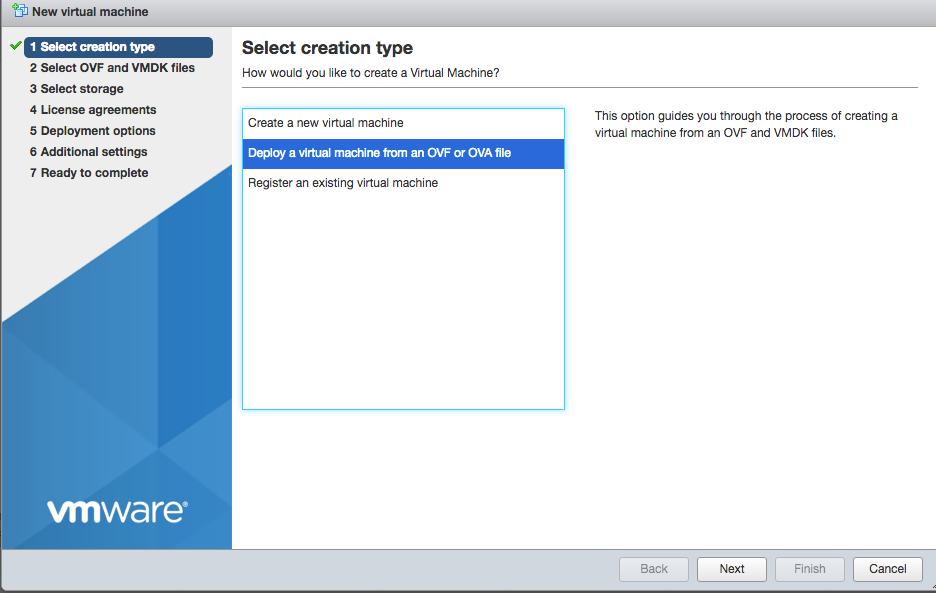
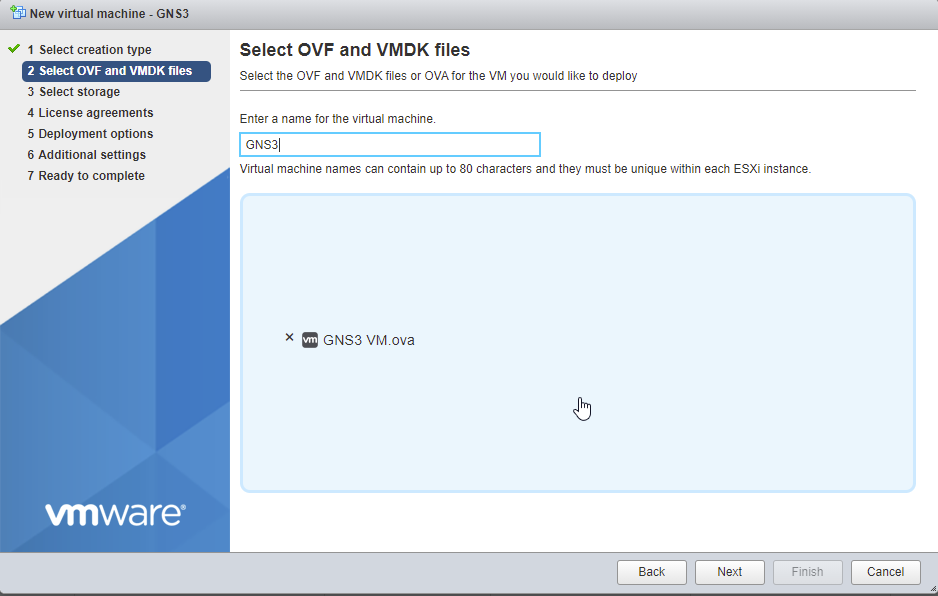
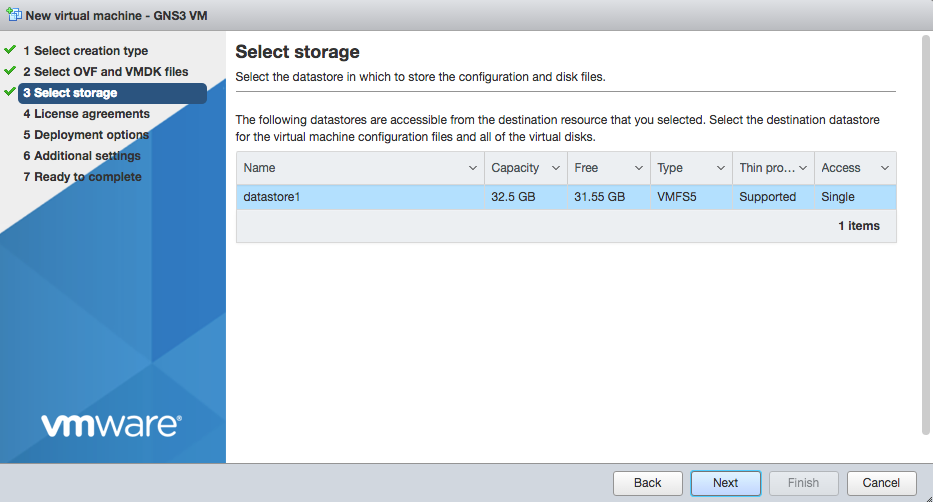
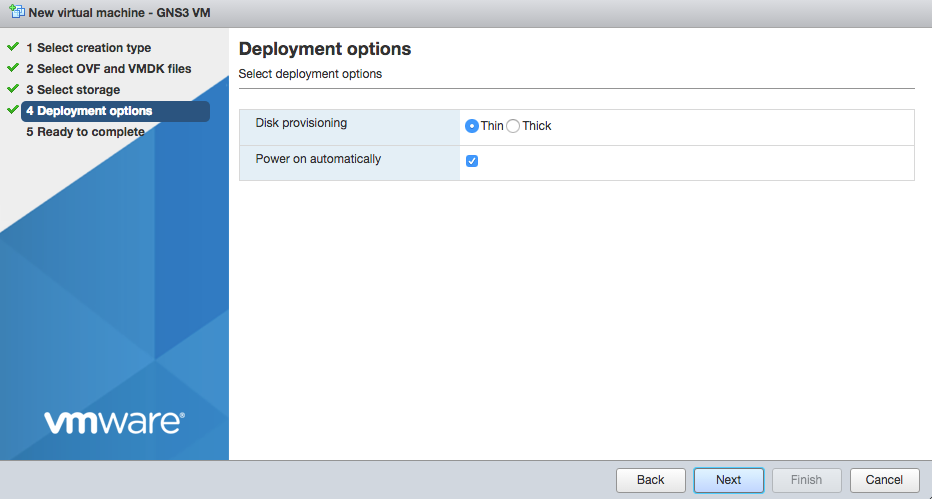
Create VM / Import OVA3


Choose ”Deploy a virtual machine from an OVF or OVA file”
Enter a name for the virtual machine, and upload the OVA file, if you downloaded a zip file you will need to extract the ova file first
Select the datastore of your choice and continue.
Thin provision is most used here
At the end of wizard wait for disk upload:

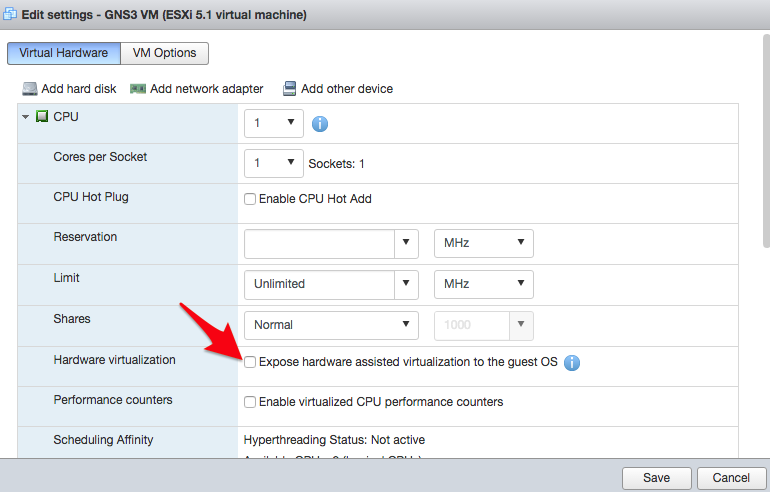
Nested Virtualization


Nested virtualization is needed, and Devices in GNS3 will not function properly without it

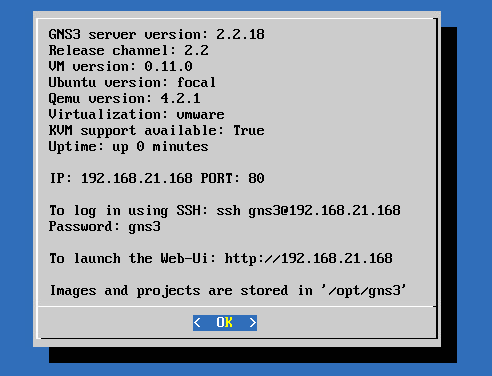
the next picture will show how you fast can determine if the VM is supporting nested virtualization, if this says True you can skip the next steps

if KVM support availble says False, neested virtualization is not enabled

in most cases this is solved by activating “Expose hardware assisted virtualzation to the guest os” on the VM , and activating Intel VT or AMD-V in the bios

Enable “Expose hardware assisted virtualization to the guest OS”

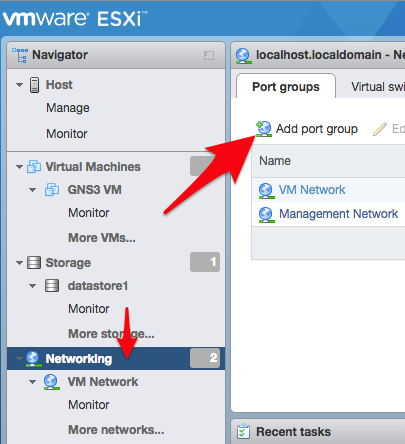
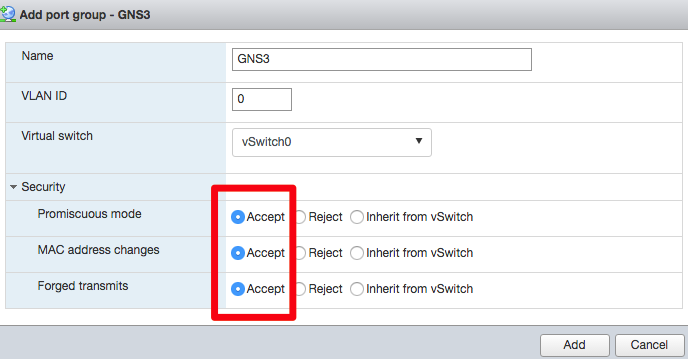
Cloud Node / External Connections


By default VMware for security reason will block forged packets, which means the cloud will not work. To fix that create a new port group:
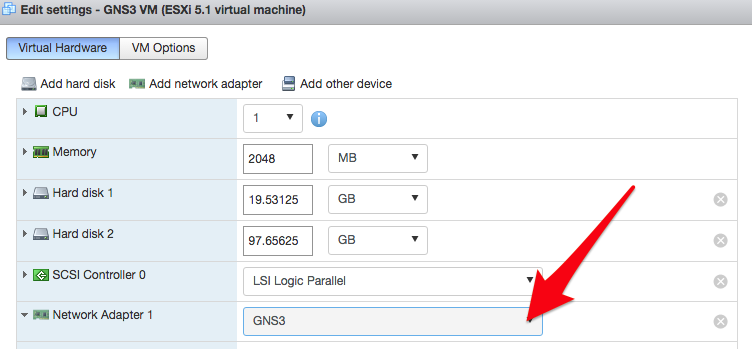
Networking -> add port group
under security accept everything
Edit the virtual machine and change network adapter to the new port group

Add VM in GNS3


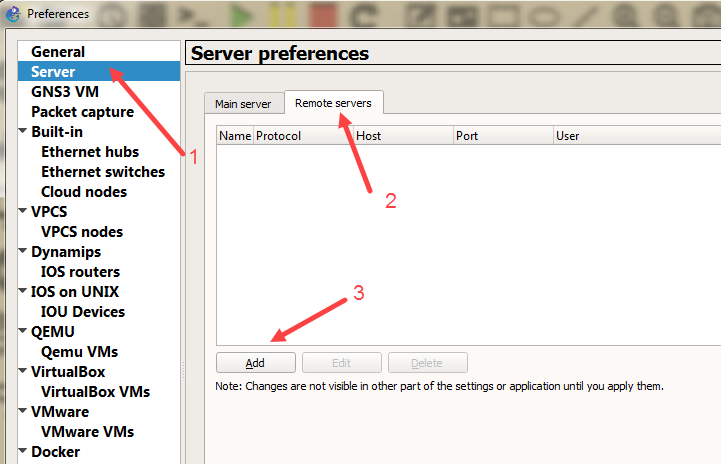
you can do this by the Setup Wizard or under preferences, here is a guide to do it the from preferences

Server -> Remote Server -> Add
Give you GNS3 server a name, type in the IP address and port number of the server, these information can be found in the GNS3 Server Console from vmware.

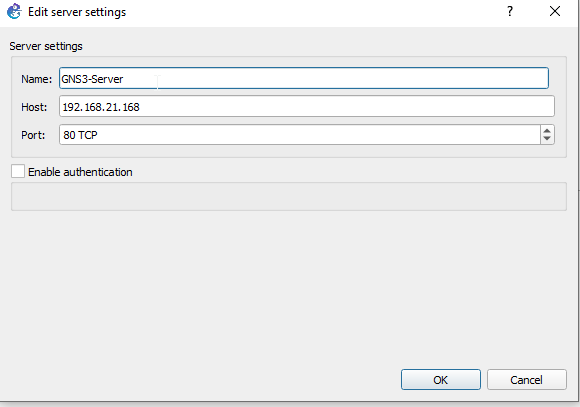
Newest version of the VM runs on port 80 and older version runs on port 3080 and does not display the port number, newer version show the port number after the ip address

Version 2.2.18

Leave a Reply

Your email address will not be published. Required fields are marked *